4 Simple Dot Sticker Activities
“Everything starts from a dot. ”
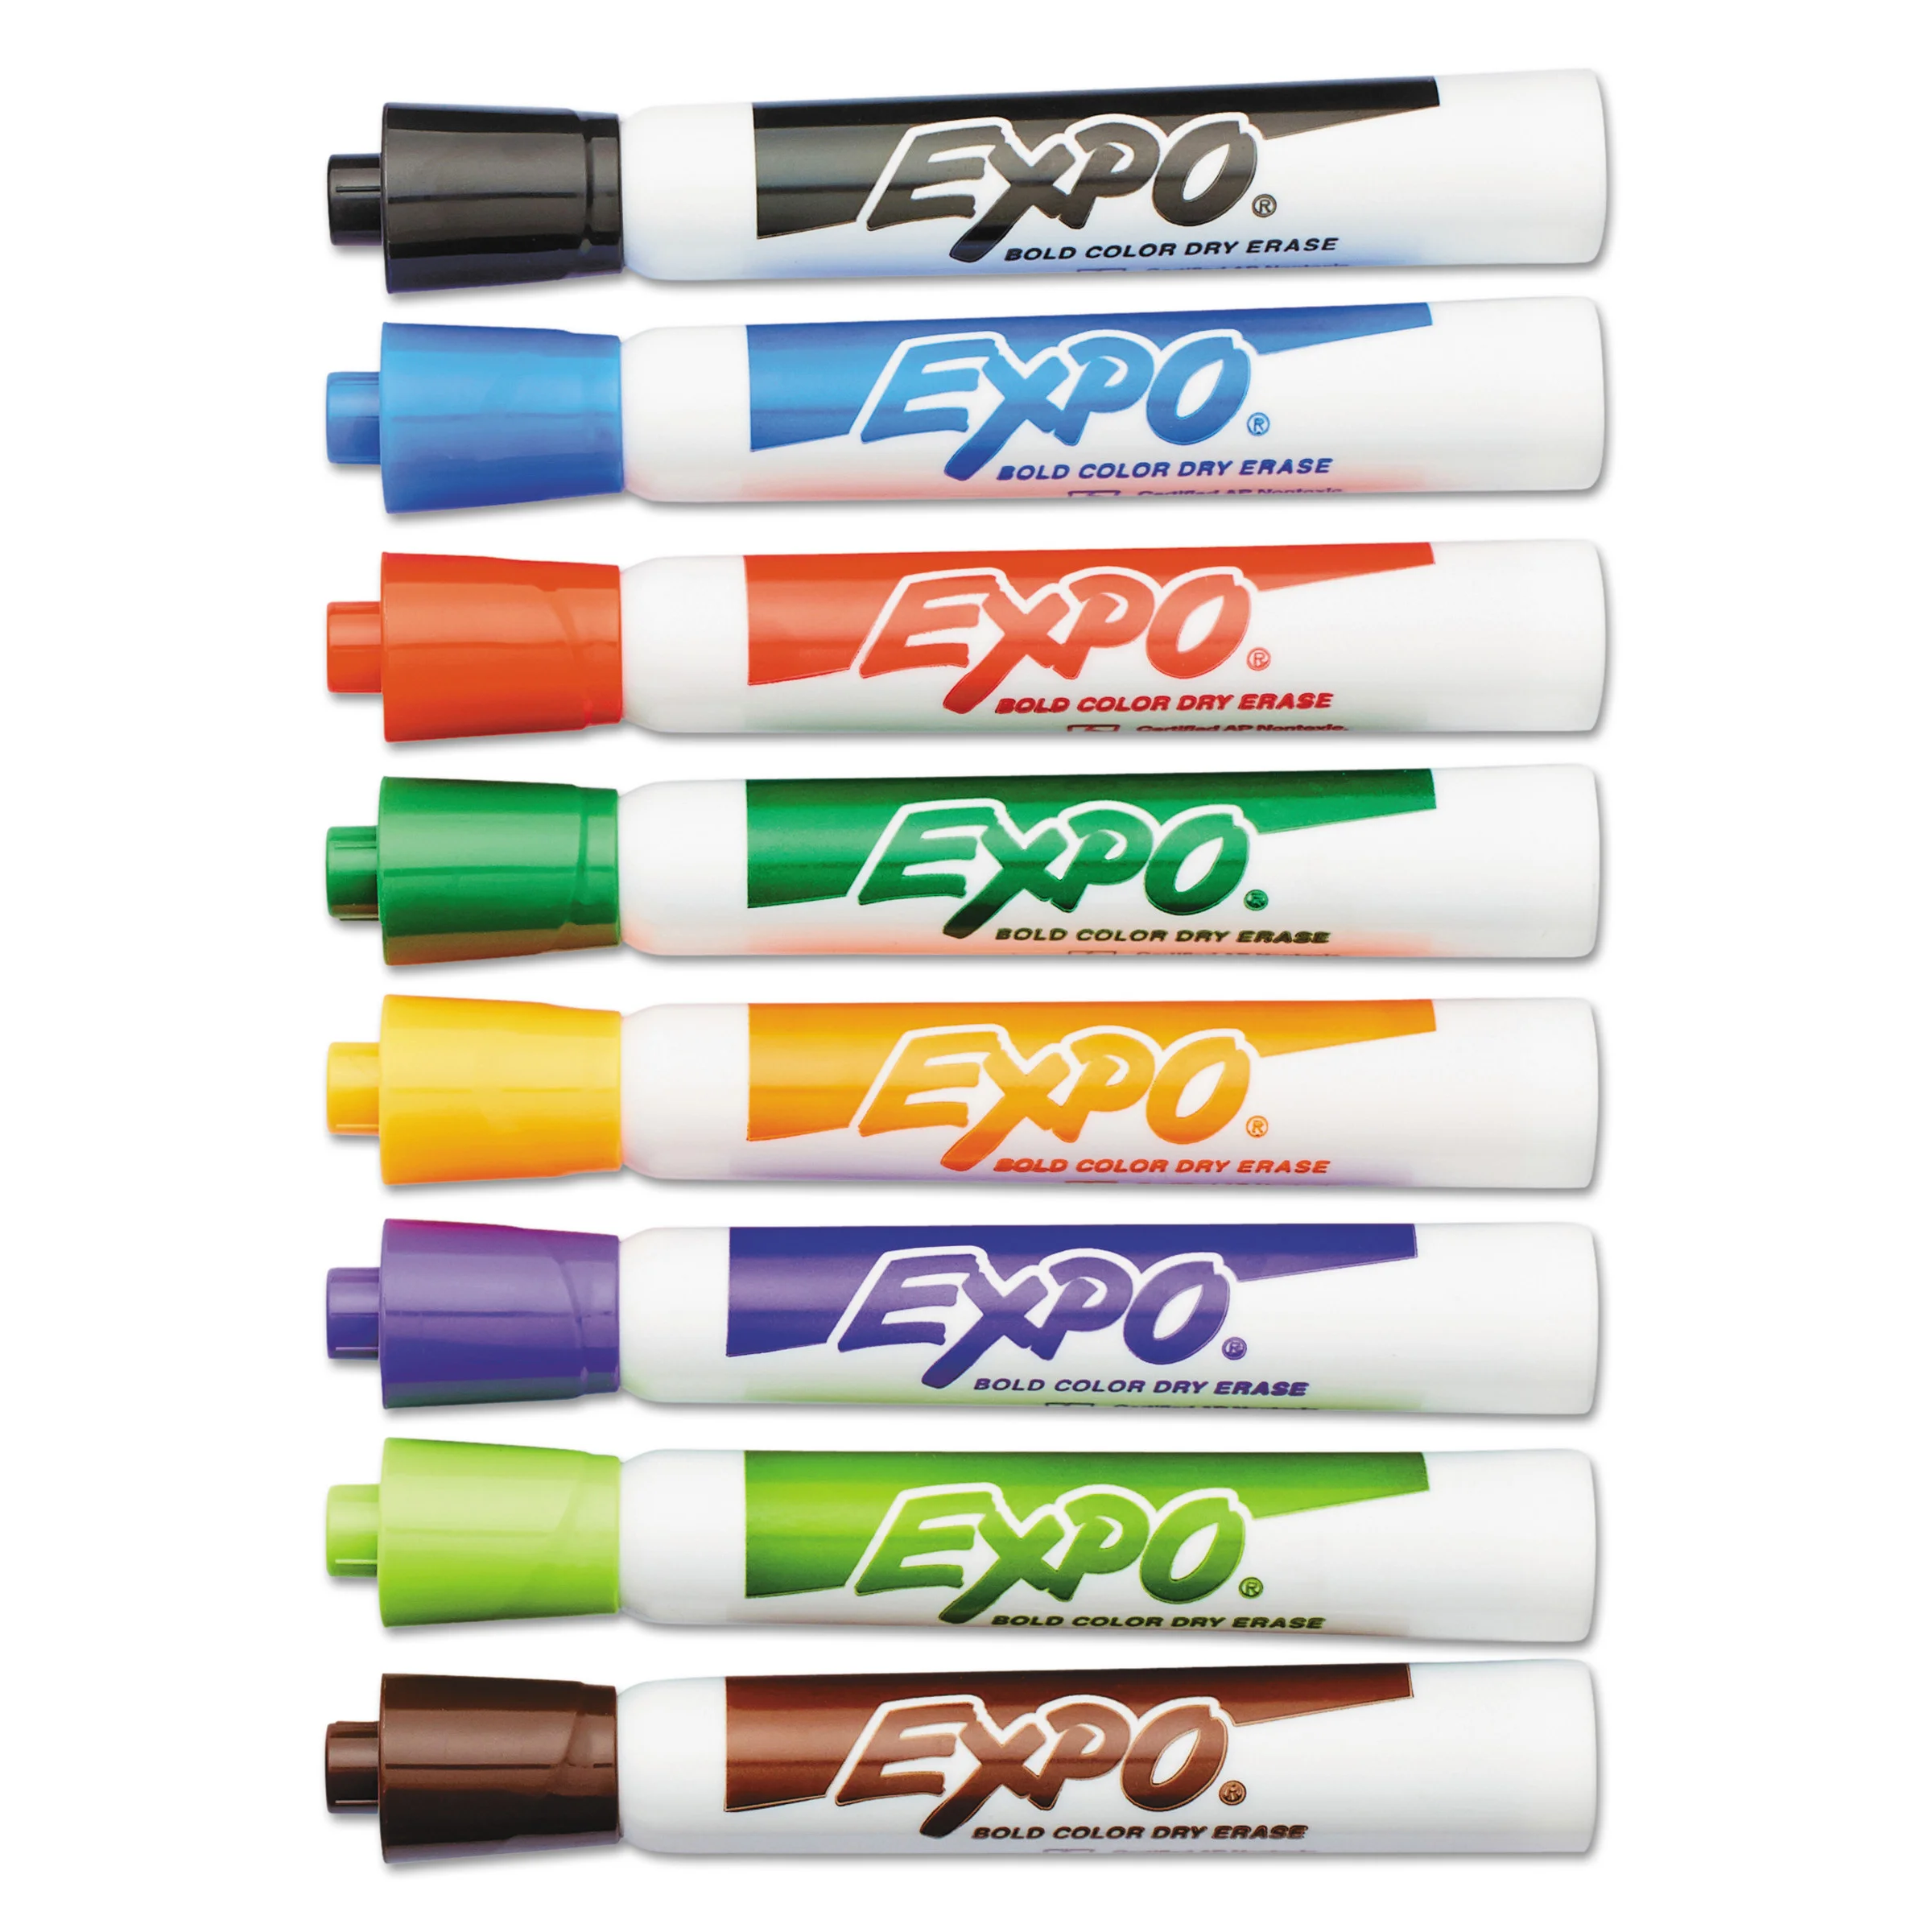
Confession time: I am an obsessive hoarder of dot stickers. I pick up a package (almost) every time I pass them at the dollar store because of their versatility with little ones. Need some time to get chores done, cook dinner, or sip a hot coffee? Set up a quick dot sticker activity and all will be possible. Below are four of my favourite dot sticker activities; perfect for toddlers - a great way to encourage fine motor skills, work on building attention, and develop focusing skills - not to mention the educational benefits that can be worked into the activities:
All of the ages listed are suggestions. Some children will be far too advanced to find an activity challenging and some will not have the foundational skills needed to complete the activity. However, if your child finds these tasks easy, it doesn’t mean they won’t enjoy them. My daughter loves the listed activities even though she finds them simple. On the other hand, my son is still working on building foundational skills and will need to work his way through the more challenging tasks. Needless to say, it’s important to know your child's capabilities and how far to push their limits. Remember, they are children, each one learning at their own pace, while holding their own special skill set. Don’t force something that is causing them to break down and don’t let them give up without working to their full potential.
1) Colour match (18m+)

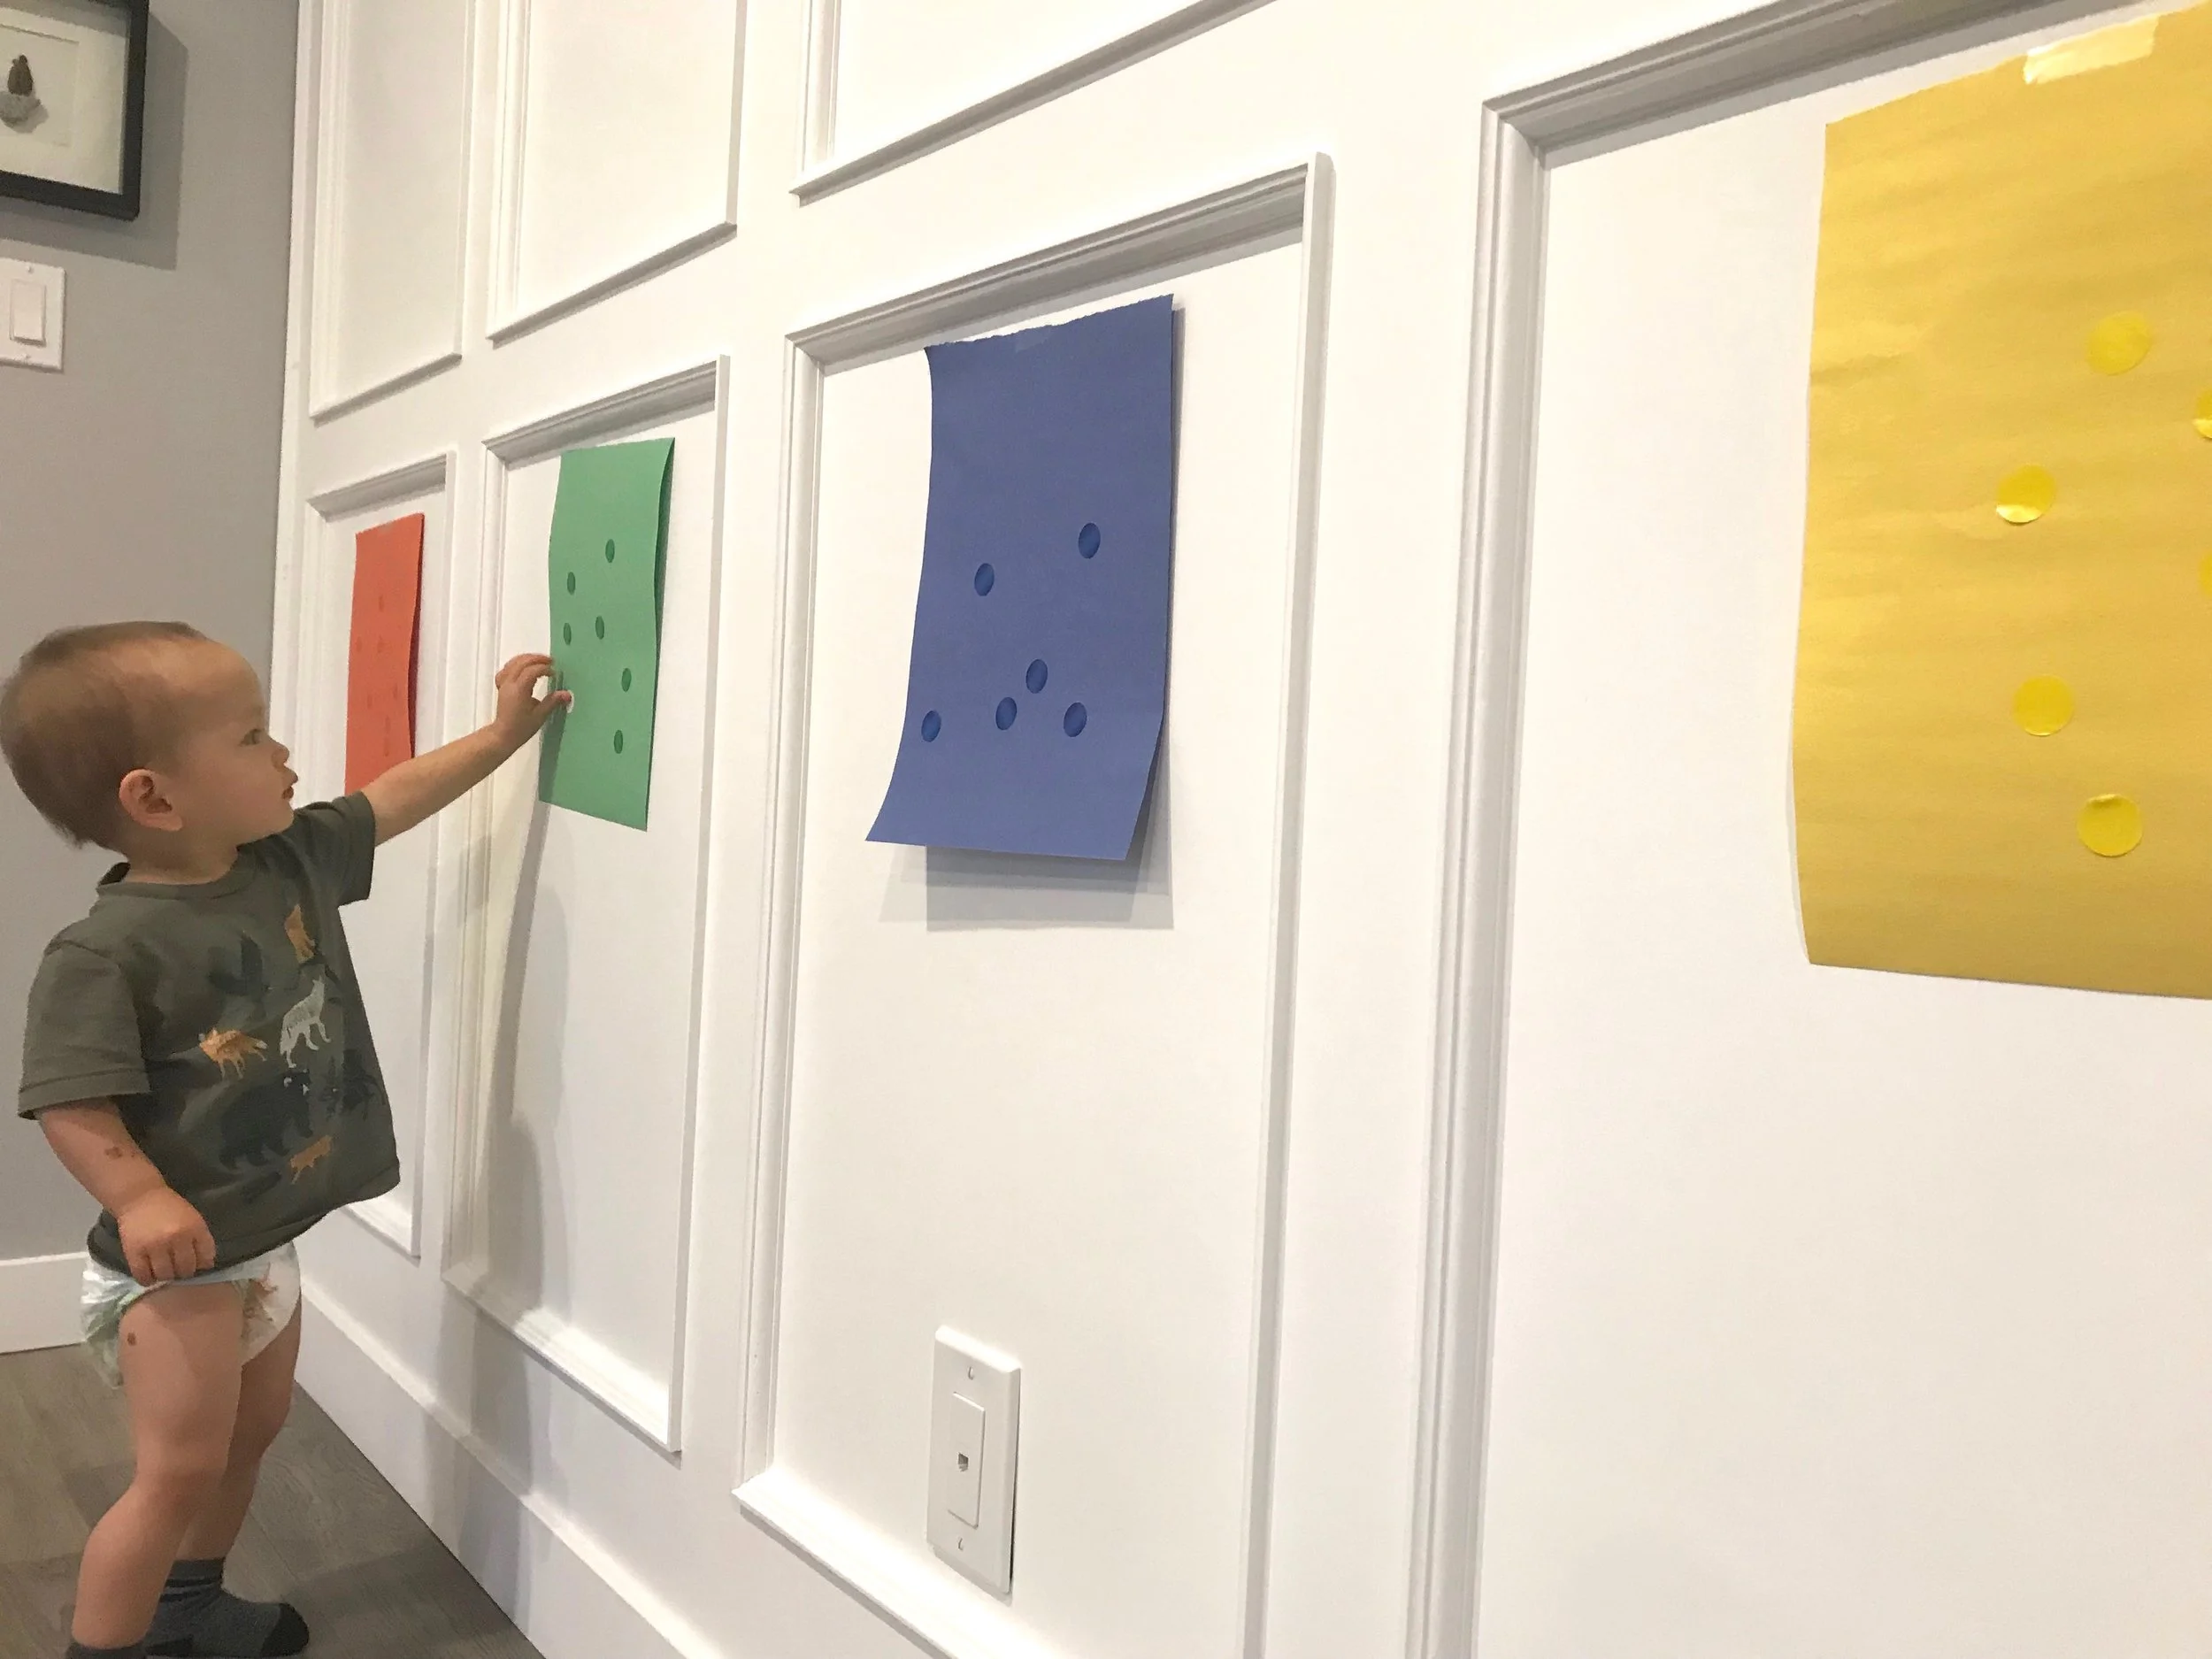
1 - Tape up different coloured construction paper along a wall to correspond to the colour of your dot stickers.
2 - Give your children dot stickers have them match them to the corresponding piece of paper.
The more colours you use the more challenging the activity becomes.
For really young dot sticker users you may need to assist with pulling the stickers off.
For younger kids, it will be helpful to give them one sticker at a time to help them stay on track and better understand the activity.
2) Letter match (2yrs+)

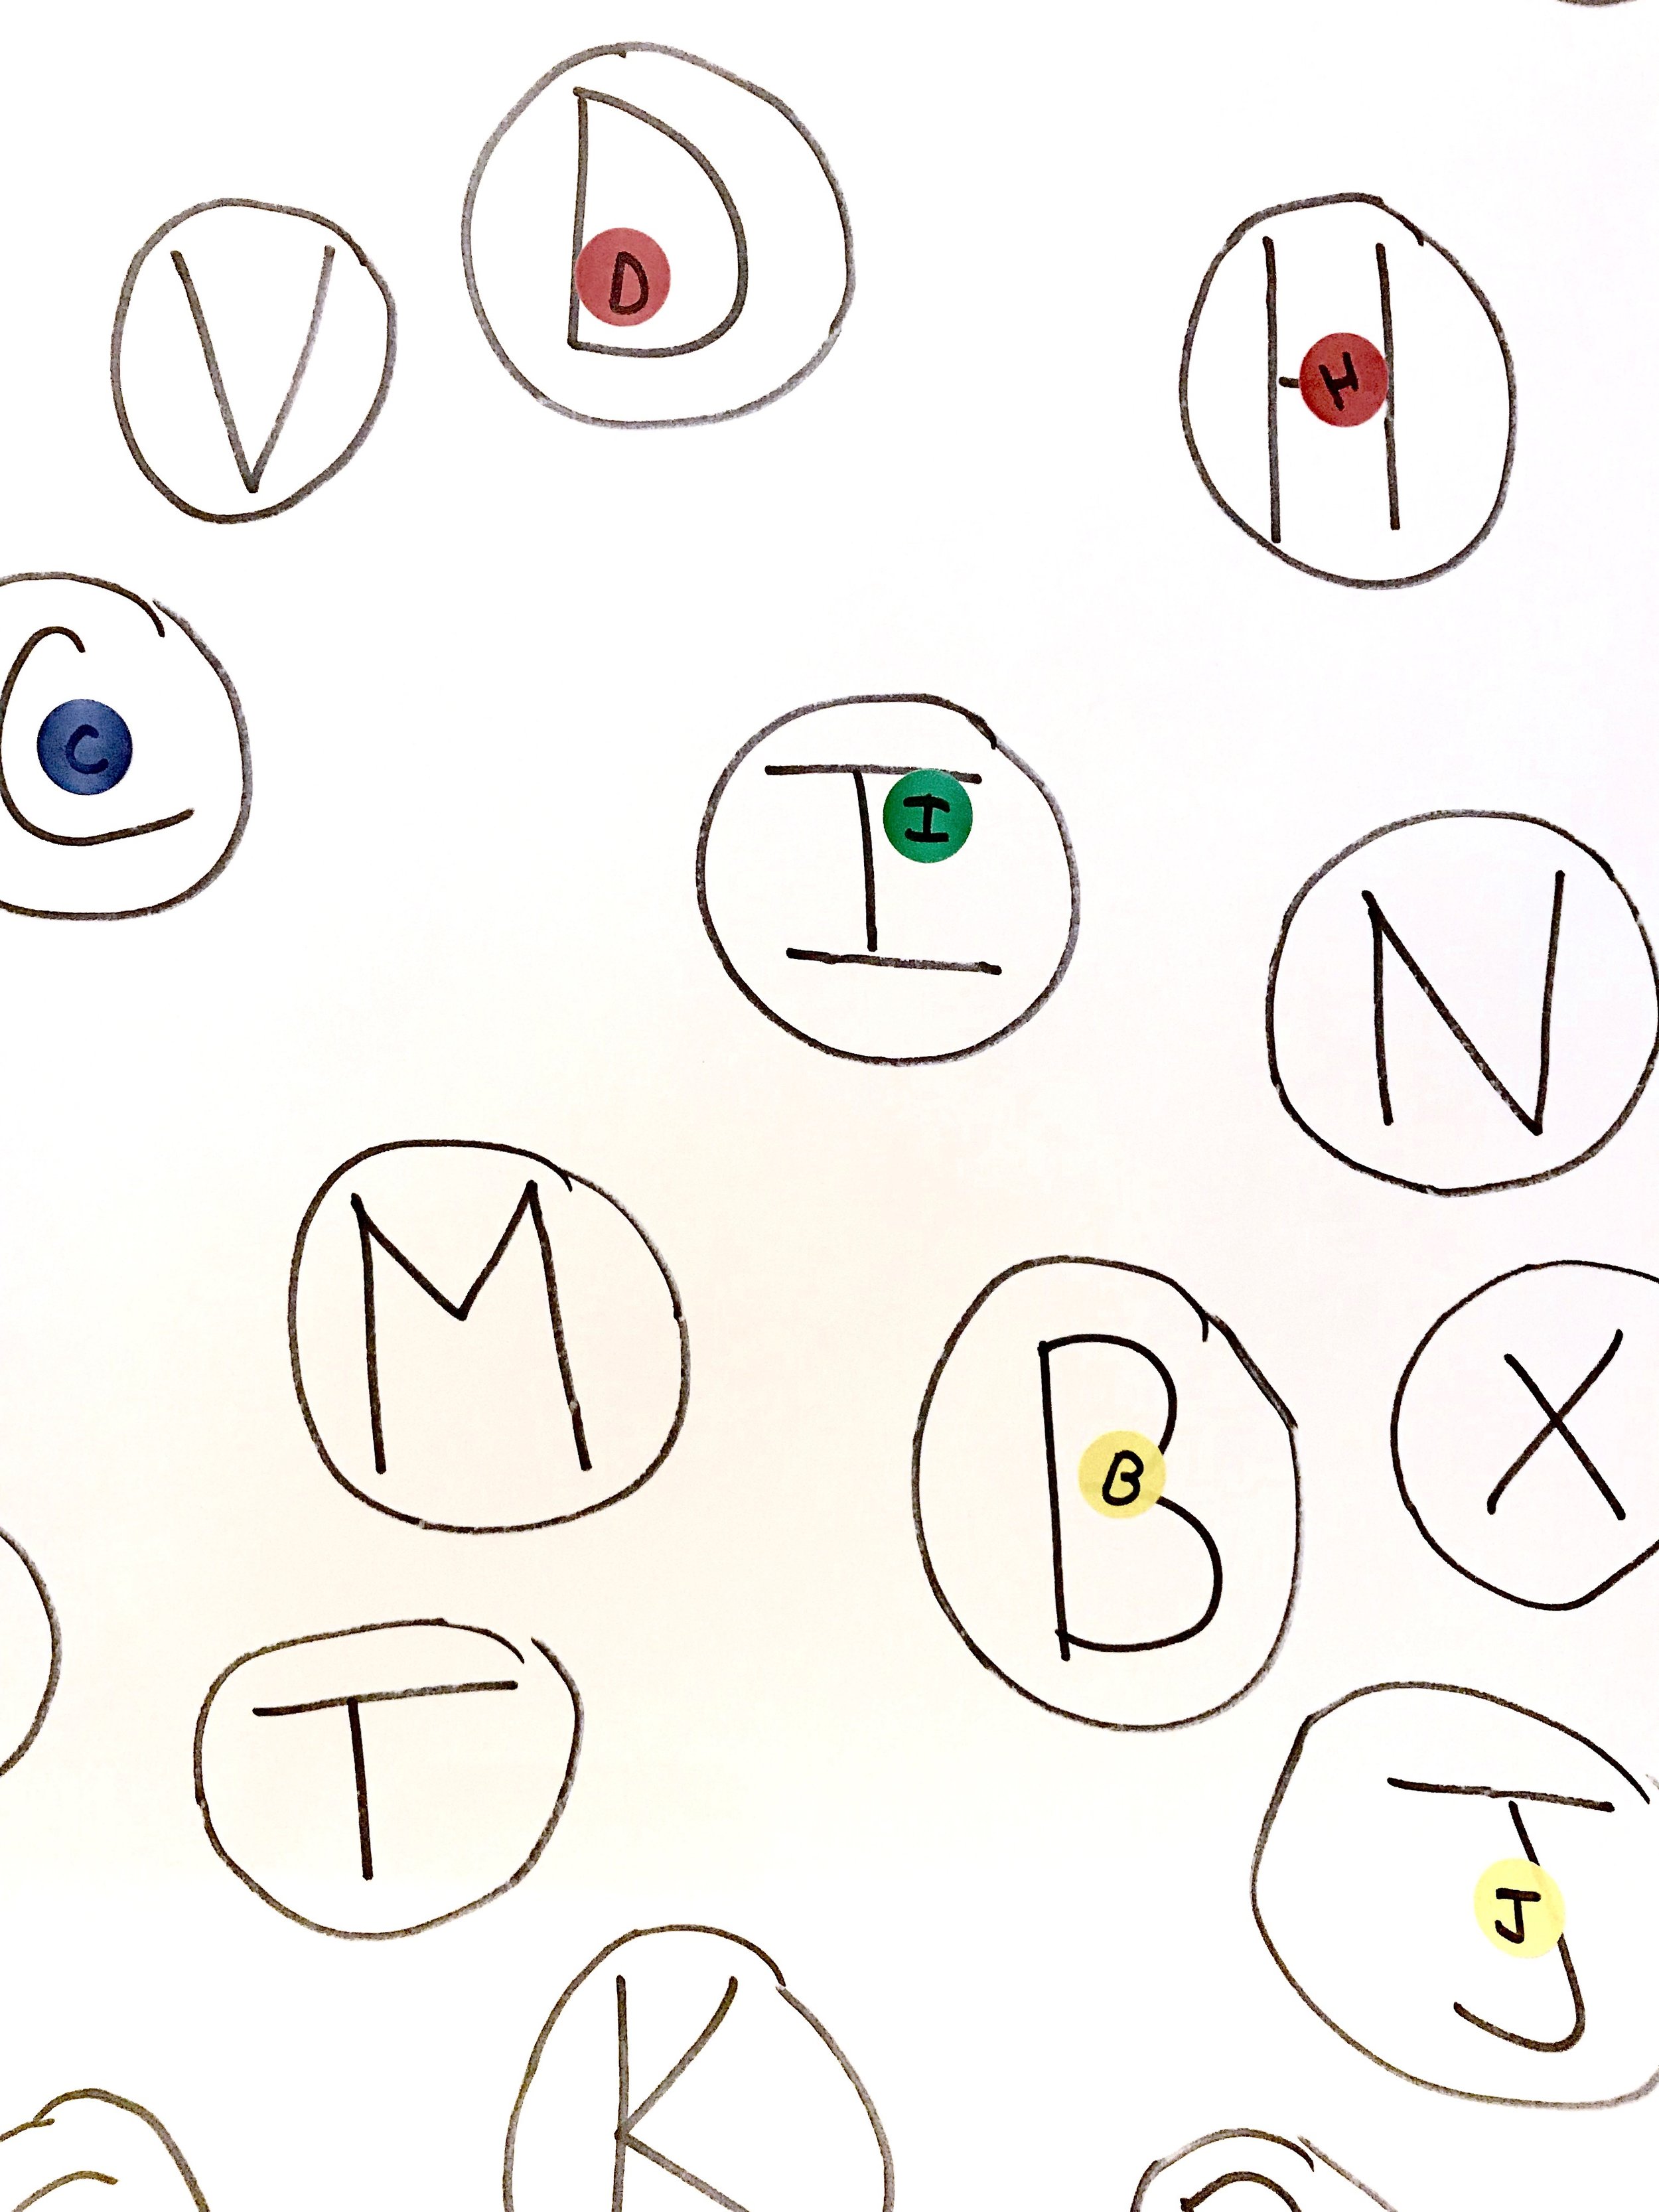
1 - Write the letters A through Z randomly on a large sheet of paper.
2 - Circle the letters so there is a visible designated area for them to place the sticker.
3 - Tape the piece of paper onto the wall.
4 - Write letters on dot stickers.
5 - Have your children place the dot stickers onto the corresponding letters.
You can write the same letter multiple times to prolong the activity.
Need more of a challenge? Write lowercase letters that they have to match to uppercase letters or vice versa.
Just starting to learn letters? You may need to prompt your children with hand over hand assistance and slowly dial back the amount of help as they learn what the activity. You can also start with fewer letters to make the activity easier.
3) Addition (3yrs+)

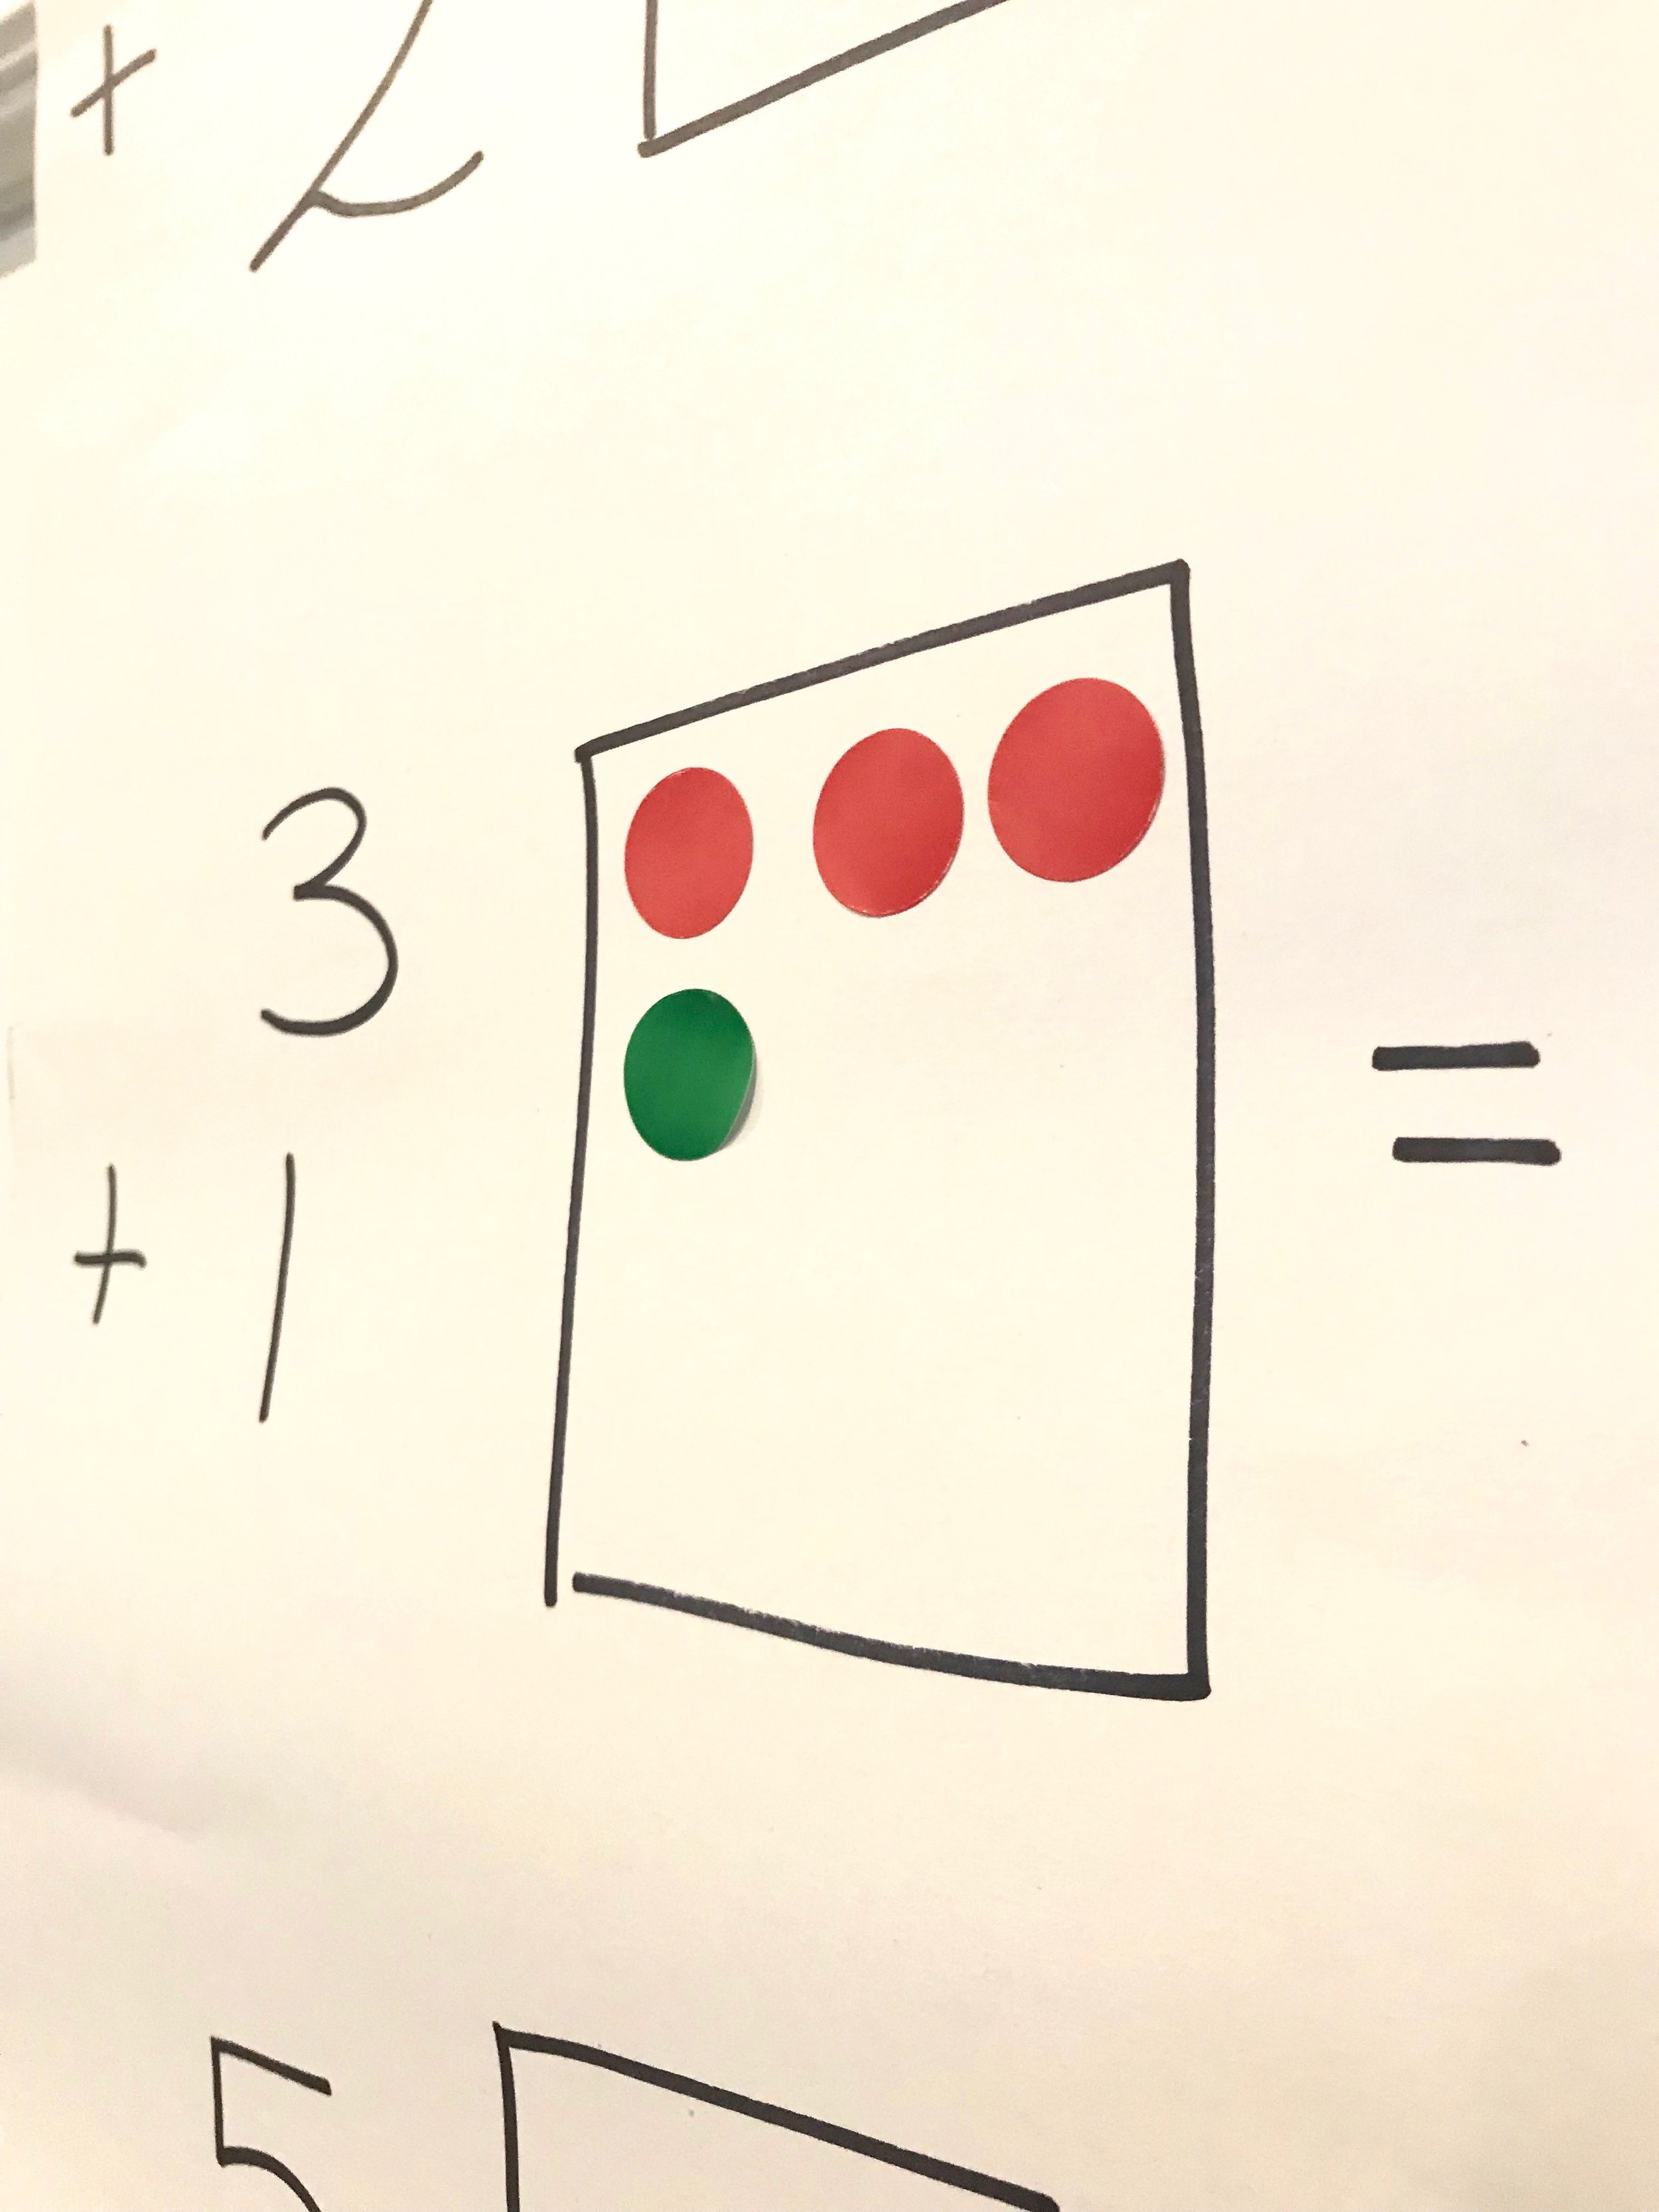
1 - In large bold lettering, create a page with simple addition problems.
2 - Draw a large enough square next to each addition problem to fit the number of dot stickers needed.
3 - Draw an equal sign next to the box to indicate to them where they should put their written answer.
4 - Place your worksheet onto the wall.
5 - Have your child use different colour dot stickers to represent each number within a problem.
6 - Let your child place the dot stickers into the answer square.
7 - Have your child count the final number of stickers.
8 - Let your child write the answer on the paper next to the equals sign.
Instead of using math terminology such as “two plus two equals four”, say “two and two is four”.
If your child is further along than simple addition and capable of using double-digit numbers than this activity is neither age or budget appropriate. Instead, you could start teaching subtraction by having them cross out dots or do early multiplication with simple numbers by forming groups.
4) Pattern Caterpillar (3yrs+)


1 - Draw circles attached to each other to represent the body of a caterpillar.
2 - Draw a caterpillar head on the final circle.
3 - Using dot stickers, create a pattern starter for each caterpillar.
4 - Place the paper on the wall.
5 - Instruct your children to continue the pattern.
Start with simple patterns (e.g., two alternating colours) and get more challenging as they advance.